Tuesday, July 15, 2014

Teleporting Necrons

At a time when I should be painting, or at the very least priming, the obsession continues to degrade my focus. Thus, new conversions have appeared on my work table. Presenting: the wonderful, mind-bending, teleporting Necrons!


These guys are the first of a small troop of Necrons meant to travel in the Night Scythe. In many games I deploy a unit of 14 Warriors and a Lord (usually with Res Orb and Warscythe), and I thought it would be cool to have a dedicated unit. So it was that I designed and built these guys, meant to look as if half (or more, depending on the model)-materialized, ready to fire. on unsuspecting foes.


The Warriors are just cut up here and there, with added Liquid Green Stuff and the digitized bits from the Tesseract Vault kit.


The Necron Lord is customized from a couple left over bits from my Overlord model (which was used to create Kutlakh), including the crown and Res Orb hand. The legs are Warrior legs cut for better positioning, and a small spine piece from an Ark pilot.

And that's it for now! I have more bits en rout to create 8 more of these Warriors and then I'll update you when I paint them. I'll probably paint these up before getting back to the grind of my Infinite Phalanx, or the myriad of other vehicles and models I have waiting.


Thanks for checking out more of my army!

Friday, July 11, 2014

Canoptek Conversion - The Kraken

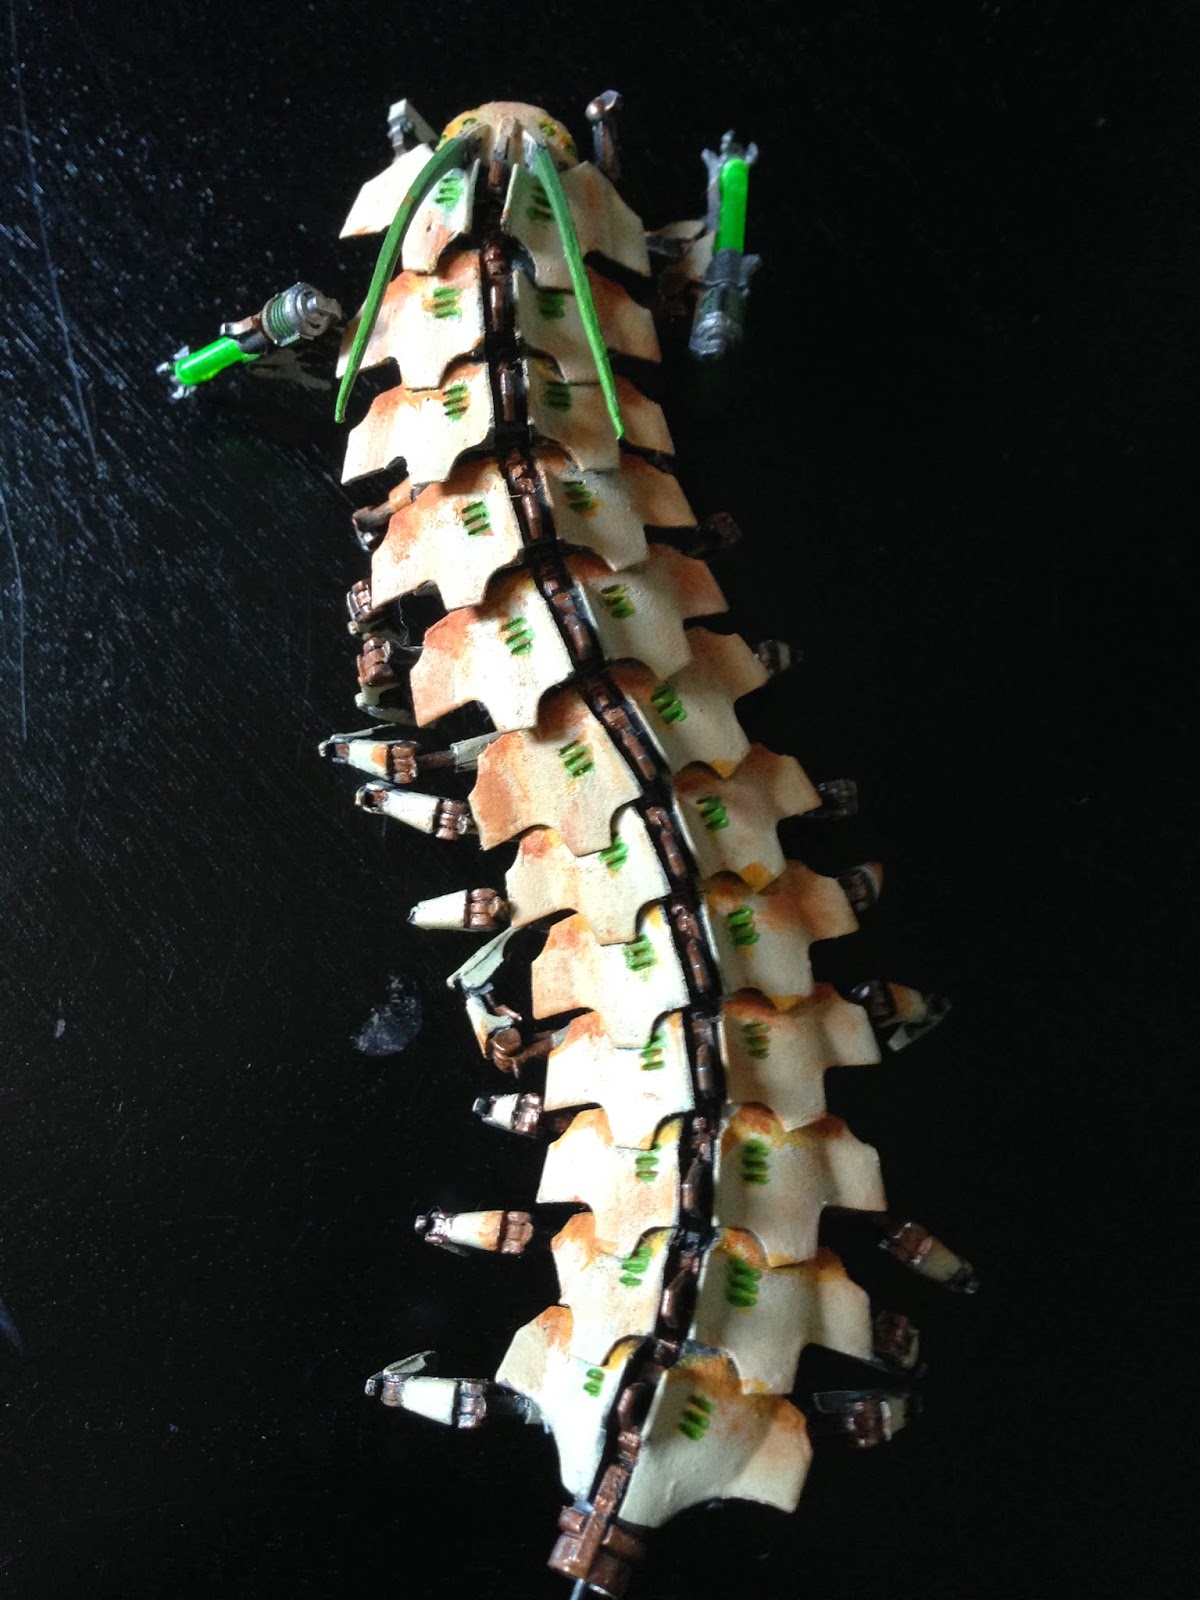
And here it is, my favorite conversion, the Canoptek Kraken:

Nothing like a solid oven backdrop, right?
 I'm hoping to add as much detail to document this conversion as possible. This is going to be a long one, folks. I hope you enjoy it!

Let's take it from the top. Here was my shoddy sketch of how I wanted it to look:

I didn't go to art school, I'm sorry...

Actually, not too far off! I started with the idea, outlined the pieces I needed, and got right to work. Here, my work begins.


The head is obviously a Doom/Night Scythe hull, and the Doomsday Cannon of course came from the Doomsday Ark kit. The supporting tentacles are coils from the Tesseract Vault, as are the tentacles that will hold the Gauss Flayers. The piece that attaches the Cannon to the Scythe head is also from the Canoptek creature holding the C'tan, and the soon-to-be eyes are from the throne. The guns are chopped off of normal Necron Warriors. You will also see some parts from the Command Barge panel, and the small engines from Tomb Blades, neither of which made it into the final design.

Once I had laid out all the pieces, it was time to get to it!


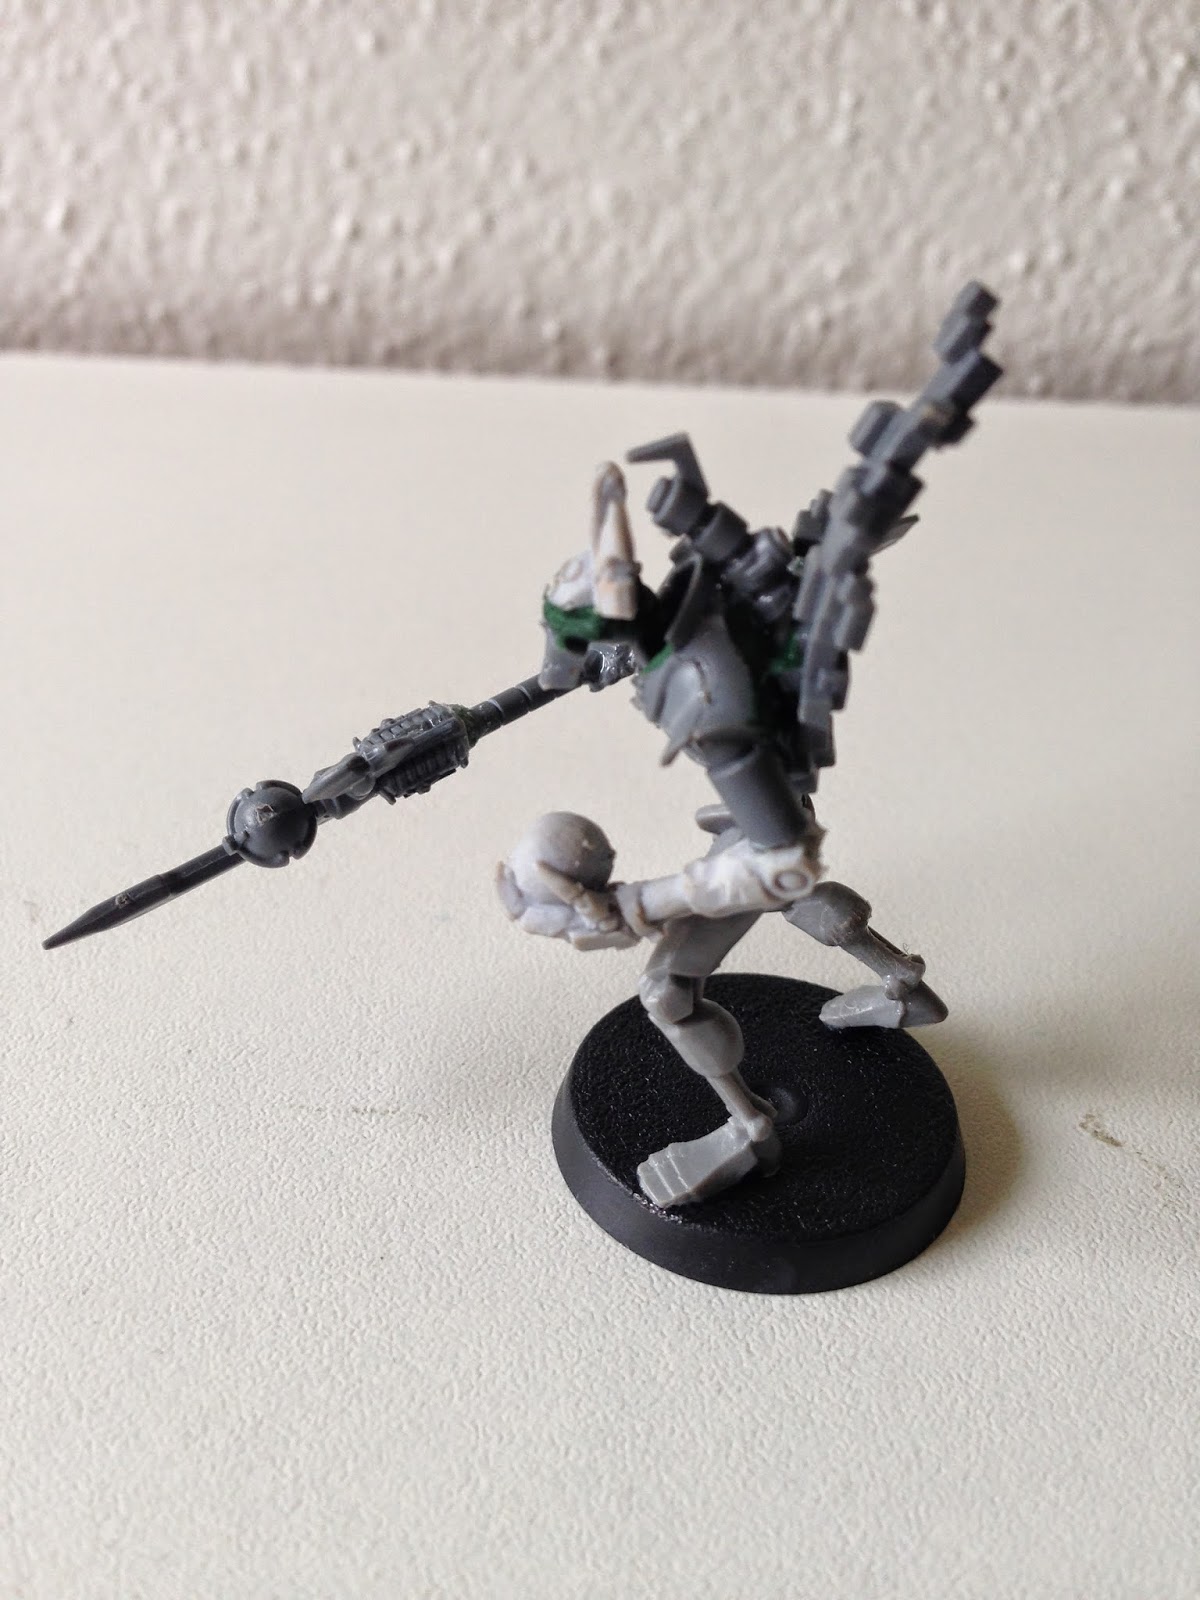
I started out by carefully taking apart the gauss flayers, removing the barrel, the hand, and the small tube. I dry fit the tip and the green rod just to check out the final product. I was pleased.


A few clips later, and we had this to view:


So far so good! Next up - cutting down the Doom Scythe to size.


Had to use a hand saw for this one. Good fun, those hand saws...

One of my favorite progress shots ever!
Next, on to the support tentacles!


After cutting off the excess from the coils, and with the help of a friendly can of peanuts, I glued on the support tentacles where those pesky Tesla Destructors would go. I later added some additional coil links to fill in the gap.


I tactlessly globbed on some Green Stuff to make the job a bit easier. This was my first time converting, and my first time using Green Stuff, so I would definitely have done this differently now. But hey, you live and learn, right?


And the Cannon is attached. The tentacles were short to follow. And the finishing touches involved a chopped up Dispersion Shield and the eyes.


I'd like to do another one soon, and have definitely learned from the experience. I would love any input or recommendations you folks might have on how to improve the design! It's a little unstable, but overall not bad. The tentacles are frail as anything, but they're just so cool I couldn't give them up.

Thanks for checking it out! As always, let me know what you think.

Custom Canoptek Creatures - An Overview

Hello there folks! Welcome to an overview of my custom Canoptek army:

Custom Canoptek Conversions - Incomplete
I am not going to go into detail about each of them here - this is only the overview! But I wanted to get up some of the pictures so you can see what is coming. I will be creating a separate post for each of these monsters so I can go into more detail.

Canoptek Dragonfly - Counts as Command Barge
 When I first started collecting the Necrons, I really loved the look and feel of the Canoptek creatures. I perused the internet looking at all the cool conversions, especially the simple Triarch Stalker conversions, and thought to myself, "Why not remove all the pilots from the vehicles and create creatures for each of them?" So that's what I did.

Not all of them are complete, like the Dragonfly above. But I'm getting there! My first post will probably be the most detailed post I'll ever do, and that is to showcase the Canoptek Kraken (or Canoptek Obliterator, Ican't decide which). Here's a peak at the finished product:

Canoptek Kraken

Thursday, July 10, 2014

Creepy Crawly Necrons

Well, like the clumsy person I am, I completely deleted the original post. So, instead of reiterating everything, I'll just post the pictures up for you all to enjoy. Sorry about that!


Ancient Tomb Objectives (Part 2?)

Welcome back, folks. Last night I decided that I liked the custom objective I built yesterday so much that I wanted to build more! (This time, no super glue to ruin my day.) So I figured while I was at it, I would break down the simple steps so you can build them too!

Start off with some Styrofoam. I used some old stuff that came in a box protecting some electronic I bought a while back. Cut them out into whatever shape you want. Next, hand primer. Spray primer didn't work so well, but I'm sure you can use a Abbaddon black if you don't have hand primer.

I used Leadbelcher and a heavy black wash. I didn't have any washes, so I just used some of the leftover primer and mixed in some water. Good enough!

Cut out and line up the slides to make sure you like the positioning. I had to trim off a bit of the excess here and them to make them all uniform size.

Next up, Liquid Green Stuff the base. Now would be a good time to add sand, or whatever you base with. Sadly, I do not have anything, so I'm hoping this texture is enough to paint.

Finally, cut up your sprue bits. You don't have to, but I like to try and shape the top end to a point. Careful of your fingertips!

And voila! Custom objective markers. I plan to make three more for a themed game of a Tomb World. The number of crystals on the front will equal the number of the objective (so up above, we have Objective #2-4). Each will represent information on the last nearby Dolmen Gates. Hopefully I can find an Eldar player for that one.

So that's it! I'm waiting on a package later today, and if it comes I'll be able to show off my Necron Tomb Stalkers, pictured briefly up above. Catch you later!

Wednesday, July 9, 2014

Custom Objectives

Take a gander at a few of my custom objectives:

Three of my custom Necron objectives
The first is just a weird thing I made with spare spines and whatnot. Not really sure what it's supposed to be though. Sometimes I say it is a Canoptek tentacle holding a Res Orb, and sometimes it's an eye being used by the Nemesor. Whatever it is, I like it!

The one on the far right is a poor Cadian being swarmed by Scarabs. At one point in time he was holding a grenade in his hand, but it fell off somewhere along the line. Now he is defenseless. Not my original idea, but the internet sure is a great place to find inspiration!

Here he is again running from more oncoming Scarab swarms. Poor bastard.
Finally, I have the one I just whipped up today! It isn't complete yet, but I am digging the way it is turning out.
Super Glue + Styrofoam = Unhappy Modeller

On the bottom you can see there were some complications. As it turns out, super glue melts Styrofoam. Yep. Everyone gets one "Duh" on that one. Ah well.

The crystals are cut up sprues! Neat trick I learned from another Necron blogger.
The front is the only side I have painted. Haven't figured out what to do with the rest of it yet. I first have to finish adding the liquid Green Stuff to fill in my error, so after that's all done and dried hopefully I'll have an idea. I'm certainly open to suggestions!

Anyways, I hope you enjoyed the view. I might be posting about the little crawler you can see in the background of that Scarab Swarm shot soon. Come on back to keep updated. Thanks!


Monday, July 7, 2014

Painting Rust

I think here, more than anywhere else in my army, is where I need the most help. And how can you help, you ask? Simple - let me know what you think! Using larger surfaces, so far only on Destroyers, I would like to paint on a more rigorous rust effect than what the Kromlech rust compound can do alone. Here are a few examples of how the rust is coming out so far.


So far, I love it! But I am not sure if that's just my own infatuation with my first attempt or actual success at portraying rust. I am using a couple different images of actual rust for inspiration, and I think it looks similar. Not exact, but not bad either.


When I get the look down pat I am going to be adding it to all my vehicle conversions (Annihilation Barges, my Ghost Ark, Doomsday Ark, Triarch Stalker, etc.).

So - What do you think? Should it be more subtle? Are the colors off? Is it perfect? Which is your favorite? Any feedback is greatly appreciated! Thanks folks.

The Bread and Butter - Necron Warriors

First of all, sorry for the less-than-perfect lighting and focus. I'm working on it!

Anyways, the Necron Warrior! Nothing special here, just the Infinite Phalanx of advancing Warriors. This displays my color scheme more than anything else. Bone color (Screaming Skull), Gold/Bronze inner-workings (Balthasar Gold), and a couple greens for the glow (primarily Warboss and Moot Greens). The orange is my intended rust effect, compliments of Kromlech orange rust weathering powder, occasionally mixed in with Casandora Yellow wash.


Lots more to paint...